Routing Ollama Through Cloudflare AI Gateway

I have been using Ollama Cloud for a while. It works, but I had two problems.
The first was visibility. I switch between a few models depending on the task — GLM5.1 for coding, Kimi K2.6 for most of the task, DeepSeek V4 when I need more reasoning. Without logs, I had no sense of which model I called most often, how much context I burned through, or whether a request took 200ms or 20 seconds. I wanted to see the numbers.
The second problem was harder to admit: my usage is low. I am paying for a subscription that can handle far more than my personal tinkering. I started wondering if I could route that spare capacity into something more useful — a backend service, a web app, an AI agent. But production workloads need observability. I could not justify pointing real traffic at a black box.
AI Gateway solves both. It gives you a single place to see logs, response times, and token consumption across providers. The feature I cared about most was the token usage dashboard. I wanted to see the numbers, and I needed a bridge between personal experimentation and something I could actually run in production.
This post is about piping Ollama through Cloudflare AI gateway using the custom provider feature.
What you need
- A Cloudflare account (free tier works)
- An Ollama Pro Subscription (Maybe free tier could work too)
Step 1: Create the gateway
Log into the Cloudflare dashboard and navigate to AI → AI Gateway. Create a new gateway. Give it a name you will remember.
Step 2: Create an authentication token
After you created the gateway, you could click the “Authentication Token” button.
This is what your client will use to authenticate with the gateway. Save it somewhere safe.
Step 3: Add Ollama as a custom provider
Cloudflare AI Gateway supports direct integrations for OpenAI, Anthropic, and others. For Ollama, you use the custom provider option.
In the AI Gateway dashboard, go to the Custom Providers tab and click Add Custom Provider. Fill in the fields like this:
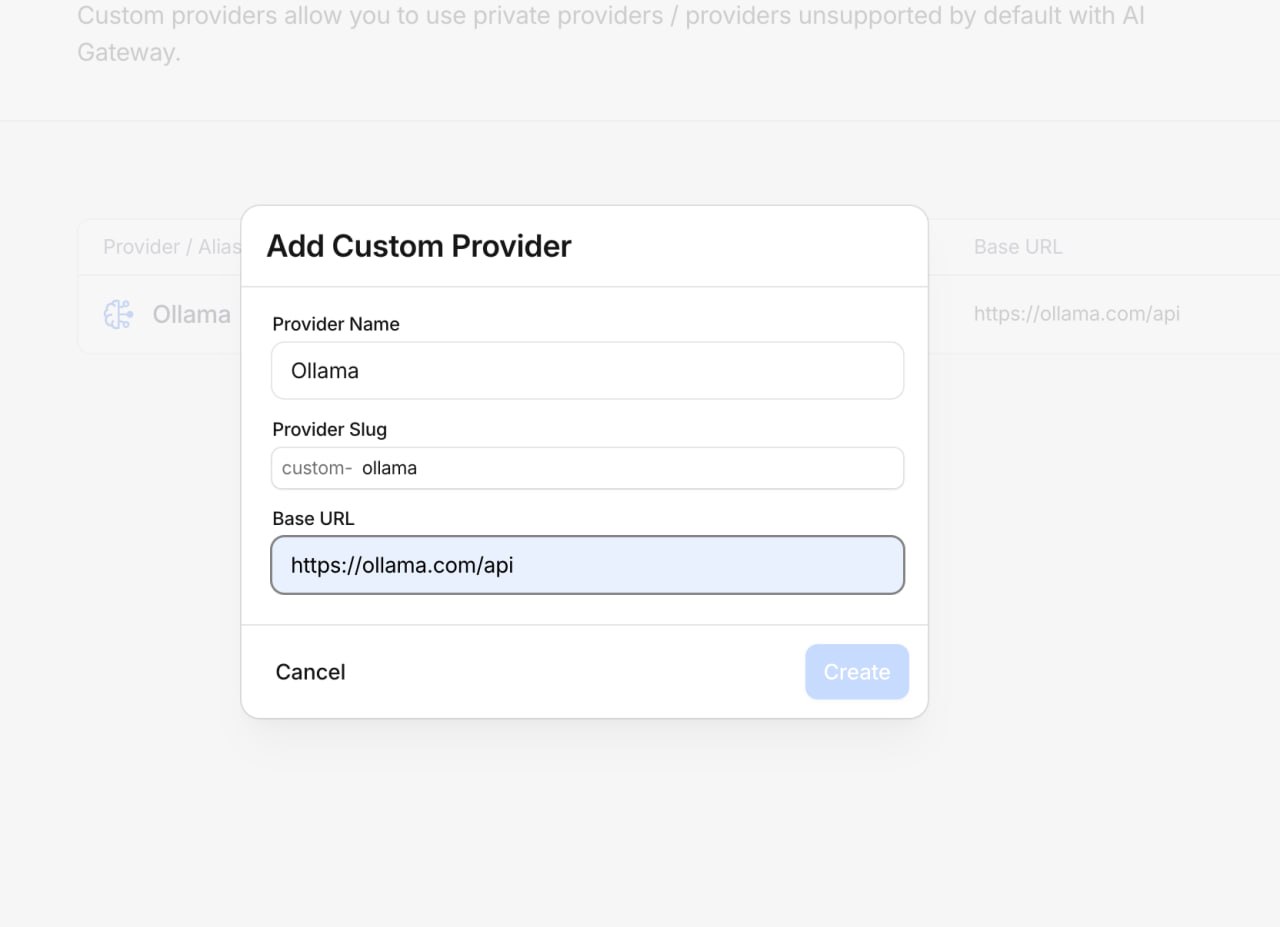
Adding Ollama as a custom provider in Cloudflare AI Gateway.
- Provider Name:
Ollama - Provider Slug:
custom-ollama(this is what you will use in the model string later) - Base URL:
https://ollama.com/api
Click Create. The gateway now has the custom provider “Ollama” configured.
Step 4: Add your Ollama API key
Go to ollama.com/settings and generate an API key.
Back in the Cloudflare dashboard, go to the Provider Keys tab in your AI Gateway. Click the + button next to Ollama and paste in your API key. Set the alias to default unless you need multiple keys.
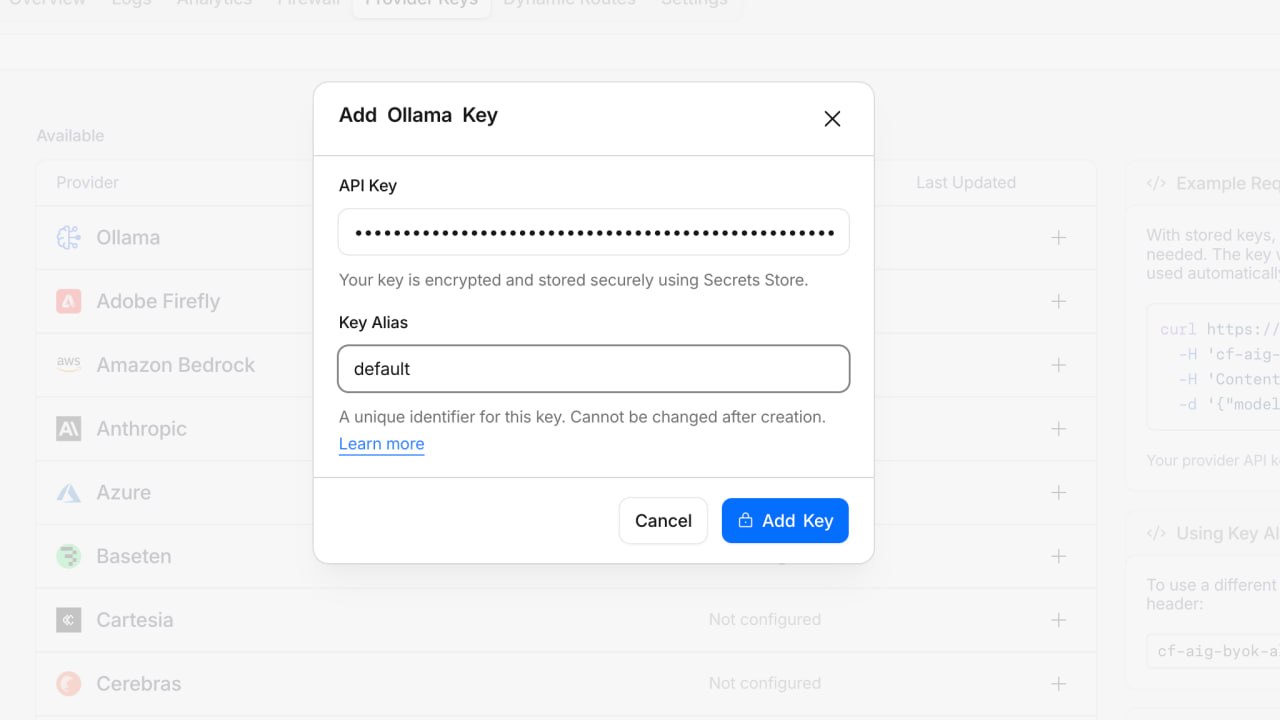
Once saved, it appears in the configured list:
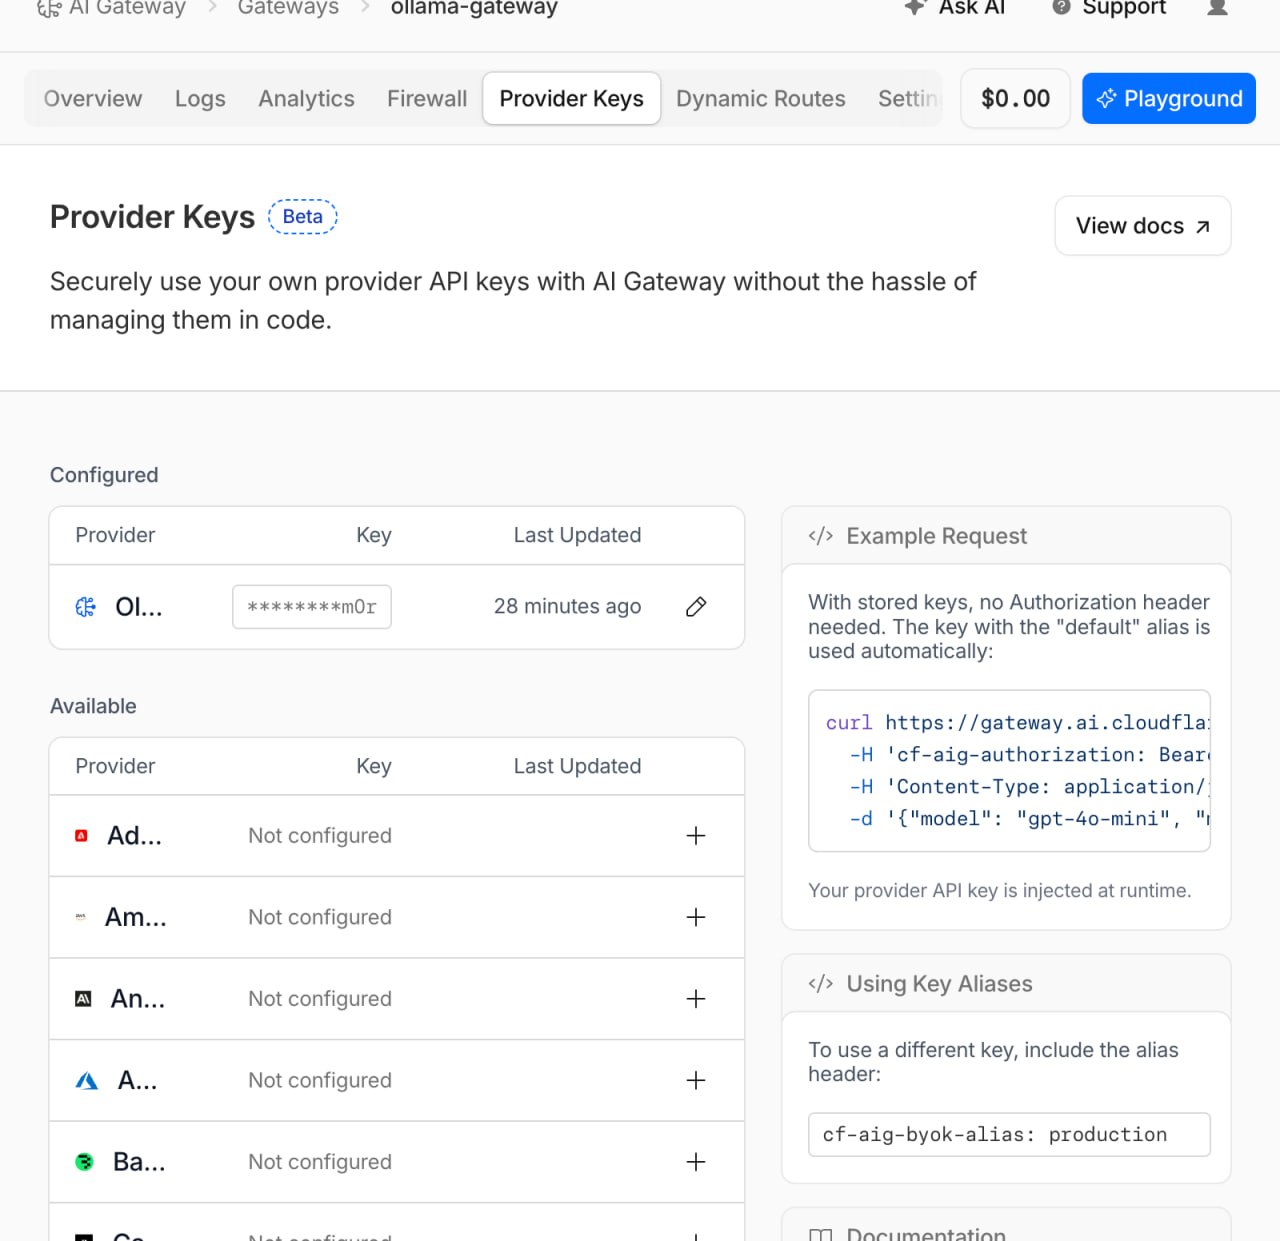
Ollama API key stored under the Provider Keys tab in AI Gateway.
Step 5: Call it from code
Here is a minimal Node.js example using the OpenAI SDK:
import "dotenv/config";
import OpenAI from "openai";

const client = new OpenAI({
  apiKey: process.env.CF_AIG_TOKEN,
  baseURL:
    "https://gateway.ai.cloudflare.com/v1/e8ded1a9c32d3d3d4890f3992820a43a/ollama-gateway/compat",
  // Only needed if you use a key alias other than "default"
  // defaultHeaders: {
  //   "cf-aig-byok-alias": "production",
  // },
});

const response = await client.chat.completions.create({
  // Format: "${custom-provider}/${model-name}"
  model: "custom-ollama/kimi-k2.6:cloud",
  messages: [
    {
      role: "user",
      content: "What is actually the blood type that attract most mosquito?",
    },
  ],
});

console.log(response.choices[0].message.content);
The baseURL follows this pattern:
https://gateway.ai.cloudflare.com/v1/{account-id}/{gateway-name}/compatAnd the model name is your custom provider name plus the actual model:
custom-ollama/kimi-k2.6:cloudWhat you get
Once a request goes through, the AI Gateway dashboard shows:
- Request and response logs — full payload inspection
- Latency — time from request to response
- Token usage — prompt tokens, completion tokens, total tokens
This is the visibility I was missing. I can now see which models I call most often, how much they cost in tokens, and whether any requests are slow.
The gateway acts like a transparent proxy. It does not change how Ollama behaves. It just records what happened.
A few notes
- If you have multiple provider keys, use the
cf-aig-byok-aliasheader to pick the right one. - Custom providers are relatively new and still in Beta, so check the Cloudflare docs if things changes.
Is it worth it?
This would be a very personal question. I have so much when fun exploring this setup and writing this post.
If you only make a few calls a day, maybe not. But if you are experimenting with different models, running benchmarks, or just want to understand your consumption, the unified dashboard is genuinely useful.
Last but not least, it helps you to make a data-driven decision.